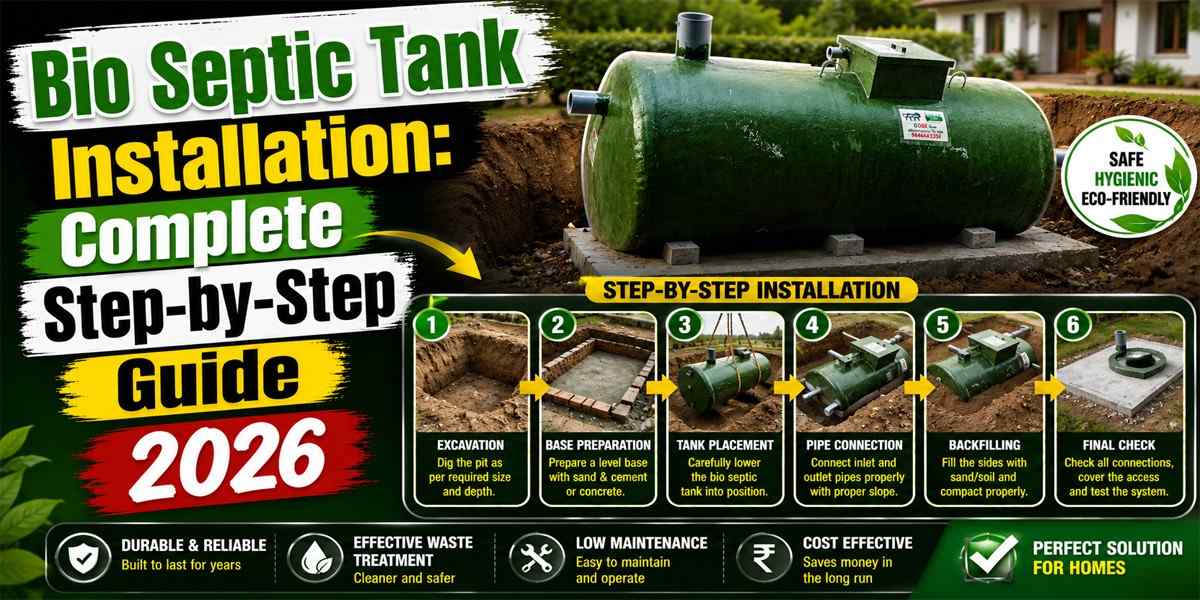
Installing a bio septic tank is a smart choice for efficient wastewater management, especially in areas without access to centralized sewage systems. These eco-friendly systems use natural bacterial processes to break down organic waste, making them both sustainable and cost-effective. If you’re wondering how to install bio septic tanks, this comprehensive guide will walk you through the entire process, from planning to final testing.
Understanding Bio Septic Tanks
Before diving into the installation steps septic systems require, it’s important to understand what makes bio septic tanks different. Unlike conventional septic systems, bio septic tanks incorporate aerobic bacteria that actively decompose waste more efficiently. This results in cleaner effluent, reduced odors, and less frequent maintenance requirements.
Pre-Installation Planning
Proper planning is crucial for successful bio septic tank installation. Start by assessing your property’s soil conditions through a percolation test, which determines how quickly water drains through the soil. This test helps determine the appropriate size and type of drain field needed.
Next, check local regulations and obtain necessary permits. Most municipalities require specific clearances from wells, property lines, and buildings. Typically, septic tanks must be at least 50 feet from water sources and 10 feet from property boundaries.
Calculate your household’s daily wastewater output to determine the right tank size. A standard three-bedroom home usually requires a 1,000 to 1,500-gallon capacity tank.
Site Selection and Excavation
Choosing the right location is a critical step in the installation steps septic professionals follow. Select a spot that’s accessible for maintenance vehicles but away from heavy traffic areas. The site should have good drainage and be on level or gently sloping ground.
Mark the excavation area according to your tank’s dimensions, adding extra space for working room. Use heavy machinery like a backhoe to dig the pit, ensuring it’s deep enough for the tank plus a 6-inch gravel base. The excavation should be approximately 2 feet wider than the tank on all sides.
Level the bottom of the pit and add a layer of compacted gravel or sand. This base prevents settling and provides stable support for the tank.
Tank Placement and Connection
Carefully lower the bio septic tank into the excavation using straps and lifting equipment. Never use chains that could damage the tank’s structure. Position the tank so that the inlet is slightly higher than the outlet, typically with a 2-inch drop, to facilitate proper flow.
Connect the inlet pipe from your house to the tank’s inlet opening. This pipe should maintain a minimum slope of 1/4 inch per foot to ensure gravity flow. Use PVC or ABS piping with proper sealing to prevent leaks.
Install the outlet pipe that leads to the drain field or soil absorption system. Ensure all connections are watertight using approved sealants and gaskets.
Installing the Aeration System
What sets bio septic tank installation apart is the aeration component. Install the air pump in a dry, ventilated location near the tank, such as a garage or utility room. Connect the air lines from the pump to the diffusers inside the tank.
The diffusers should be positioned according to the manufacturer’s specifications to ensure optimal oxygen distribution. This oxygen supply is essential for the aerobic bacteria that break down waste efficiently.
Install an alarm system that alerts you if the aeration pump fails, as the system requires continuous operation for proper functioning.
Backfilling and Surface Restoration
Once all connections are secure and inspected, begin backfilling around the tank. Use clean fill dirt free of rocks or debris that could damage the tank. Add soil in 12-inch layers, compacting each layer gently to prevent settling while avoiding excessive pressure on the tank walls.
Fill to within 6 inches of the ground surface, then add topsoil for the final layer. Slope the surface away from the tank to prevent water accumulation.
Mark the tank location with permanent markers or stakes for easy future access during maintenance.
Drain Field Installation
The drain field is where treated effluent is dispersed into the soil. Dig trenches according to your approved septic design, typically 18-36 inches deep. Line the trenches with geotextile fabric to prevent soil infiltration.
Add a gravel bed and lay perforated distribution pipes with the holes facing downward. Cover the pipes with more gravel, wrap with fabric, and backfill with soil.
System Testing and Activation
Before covering everything completely, conduct a water test by filling the tank to check for leaks. Inspect all connections and seals carefully.
Add the bacterial starter culture specifically designed for bio septic systems. These specialized bacteria colonies establish the biological process that makes the system work efficiently.
Run water through the system and verify that the aeration pump operates correctly. Check that effluent flows properly to the drain field.
Final Considerations
Successful bio septic tank installation requires attention to detail and adherence to local codes. While DIY installation is possible for handy homeowners, hiring licensed professionals ensures compliance and proper function. Regular maintenance, including periodic inspections and bacterial additive treatments, will keep your bio septic system running efficiently for decades.
By following these installation steps septic experts recommend, you’ll have a reliable, eco-friendly wastewater treatment system that serves your property well while protecting the environment.
Leave a Reply